Digitizing a signature from a photograph - from a picture to a transparent, smooth signature with adobe illustrator

Digitizing a signature is pretty easy, at least if you have the Adobe Illustrator (AI) software at hand. The following short tutorial will show you how to start with a photograph and finally get a transparent signature to sign your documents, like a CV, with.
We start with a photo that - ideally - is pretty high resolution (I use a DSLR 6000x4000 pixel picture) and features a straight line of your signature. So, a ballpen is worse than a fineliner, for example. Here we go:
We then open a new AI file and insert the pixture - simply by opening File -> Place. Or drag and drop, however you want. By the way, I use AI CC 2015 - because I want to work with Windows 8.1 :)
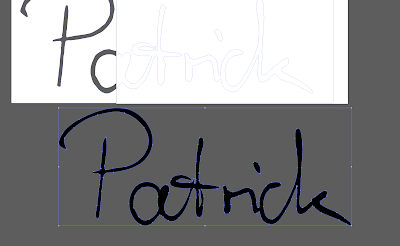
Next, we go to Object -> Image Trace -> make (use make and expand if you want the software to set all parameters, otherwise you set them on your own on the right). Here's what happens with make and expand:
Not really beautiful. When I change some parameters, I get a better result:
Still not where we want to go, the lines are not really smooth. Well, an easy task: first, click expand (should be somewhere on the top middle bar) and then Object -> Path -> Simplify. Select a curve precision/angle threshold of something like 90/90, 90/130, or 95/110 to smoothen the lines. What is left is to right-click and select ungroup, so you can only select the signature lines.
I typically then just copy and paste the signature to an empty Powerpoint file and use it :)
Yay, we're done - it's that easy.


Sie suchen spezialisierte Hilfe in Wirtschaftswissenschaften? ghostwriters-schweiz.com Ghostwriter-vwl-Dienste bei ghostwriter-vwl.com stellen sicher, dass Ihre Arbeiten gut recherchiert und professionell geschrieben sind. Ideal für Studierende, die fachkundige Unterstützung bei anspruchsvollen Themen benötigen!
AntwortenLöschen